Introduction
It’s been quite a while since my last post and I figured it was time to start contributing again so I’m kicking it off with a quick-and-dirty method to decode and replay ASK On-off keying (OOK) signals. A couple of notes before I delve in…
First, this is not intended to be an intro to SDR/RF hacking. If you’re new to the subject, I highly recommend you go through Michael Ossmann’s free video tutorial series found here: https://greatscottgadgets.com/sdr/. Beyond that, you can find other tutorials and videos online, including the material at https://www.rtl-sdr.com.
Second, I did not develop the method I’m about to demonstrate. [I know…take two years off from posting and I can’t even come back with something original 🙂 ] It’s actually something I saw in a 2016 video [https://www.youtube.com/watch?v=1kFNMbdGb_4] so full credit goes to that individual. It’s a handy method to know and I think it always helps to have multiple examples, so I felt it was worthwhile to share.
Let’s dive in…
The Setup
If you want to replicate exactly what I’m going to demo, you’ll need the following:
- A Linux distro (I’m using the latest version of Kali) with the following software tools:
- osmocom_fft
- RFcat
- Inspectrum – make sure you grab the latest version. I recommend installing directly from source on Github (https://github.com/miek/inspectrum) as the version available via my distro package manager was outdated and did not contain the features I’m going to demonstrate.
- An SDR dongle – any should do. For this demo I just used an inexpensive NooElec R820T2 NESDR Mini 2
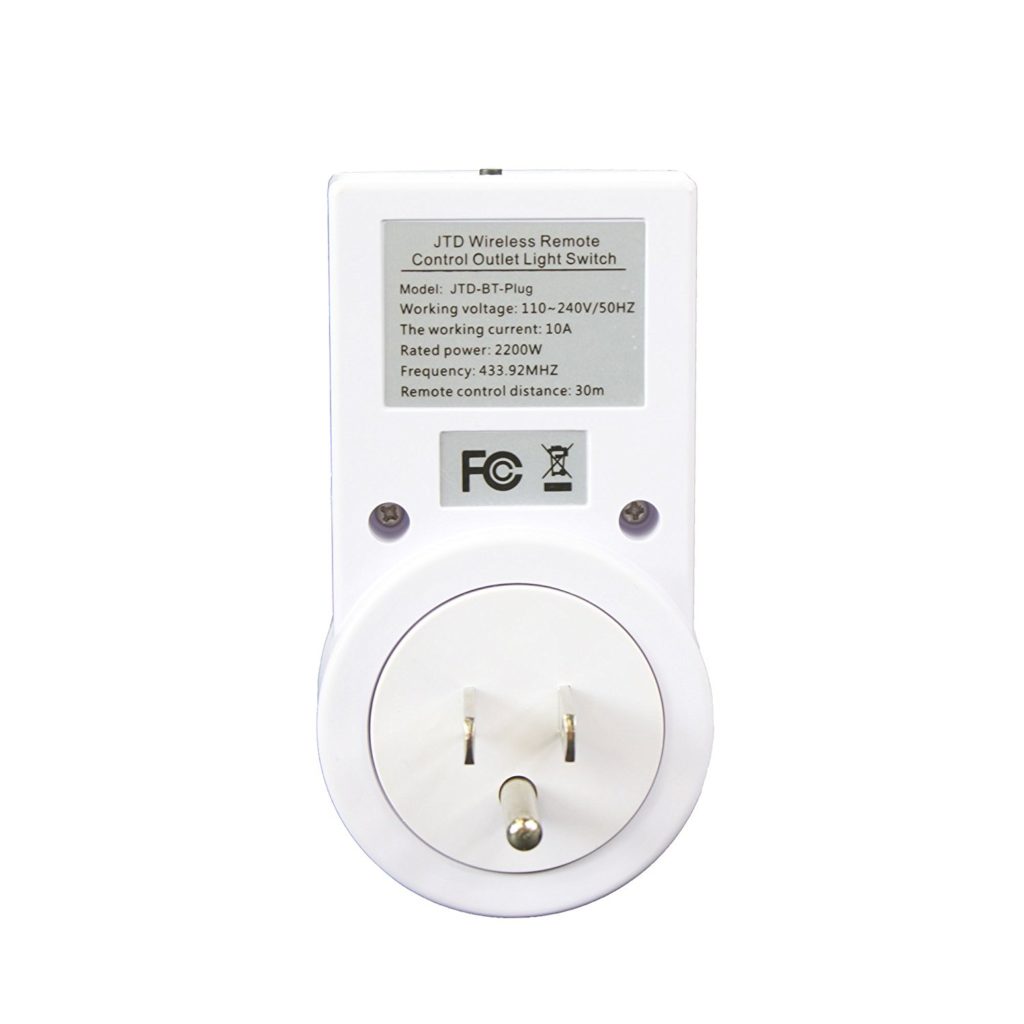
- Some device that operates using ASK/OOK modulated sub-1GHz signal. I’m using a cheap remote-controlled power outlet that I grabbed on Amazon.
Capturing the Signal
Looking at the target outlet device, I can see from the sticker on the back that it operates on a frequency of 433.92MHZ so no need to go to fcc.io for this one.
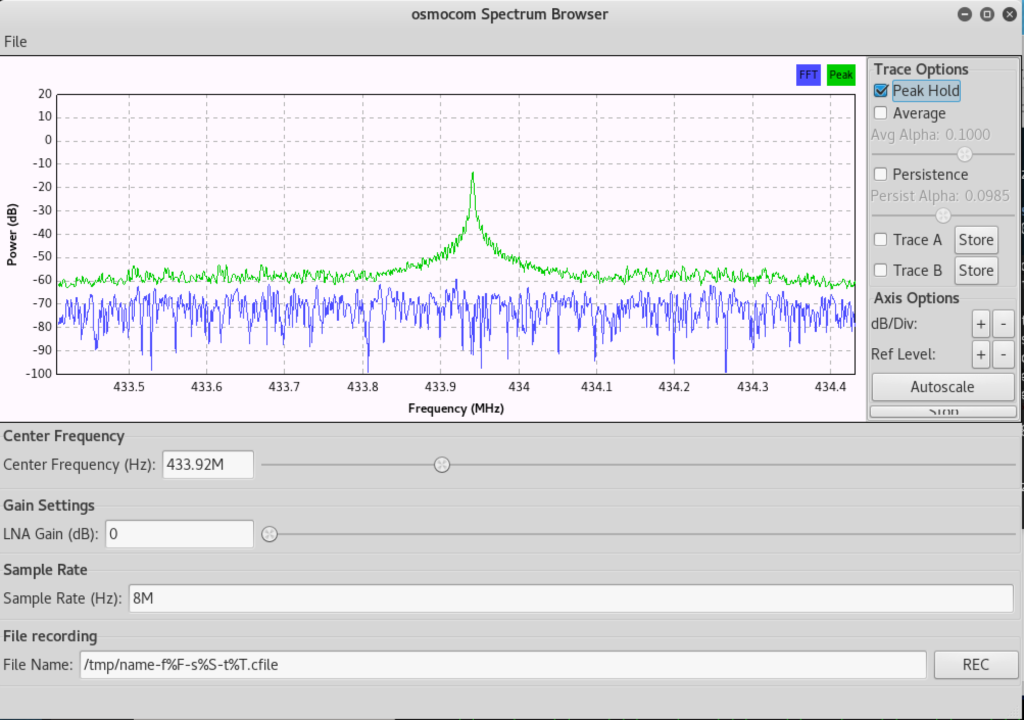
Plug in your SDR and fire up osmocom to capture the signal.
osmocom_fft – f 43392e4 -s 8e6
This particular outlet has separate buttons for On and Off. I’ll demo the On signal and the same technique will apply to decoding the Off signal.
Pressing (and holding) the On button produces the following signal.
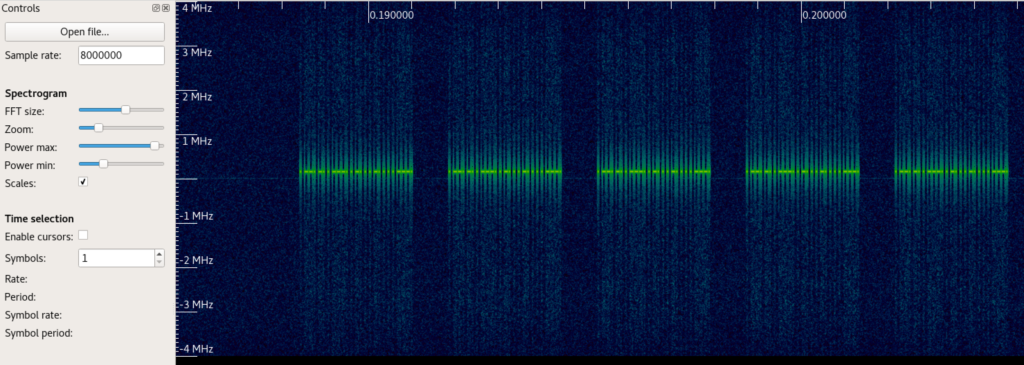
Record it in osmocom (REC button on lower right of screen) and load the corresponding file in inspectrum:
inspectrum /tmp/name-f4.339200e+08-[filename].cfile
You’ll want to ensure your Sample rate is the same (in this case 8e6) and also adjust the FFT size and Zoom to get a better visual of the spectrogram. I typically like to zoom out a bit at first just to see what I’m dealing with, which in this case (as it typically is with basic OOK) is a simple repeating signal.
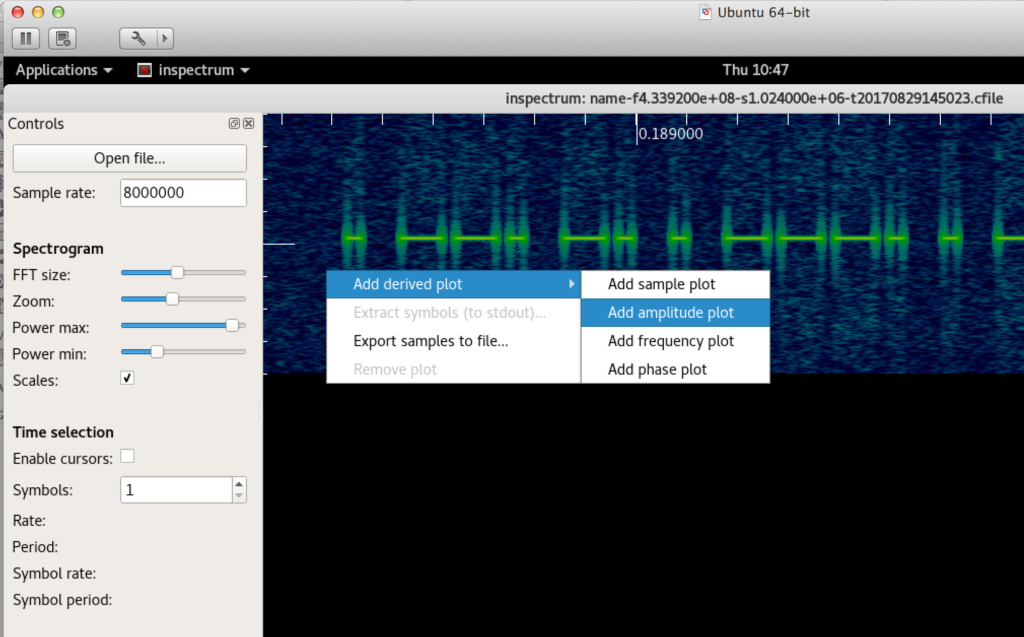
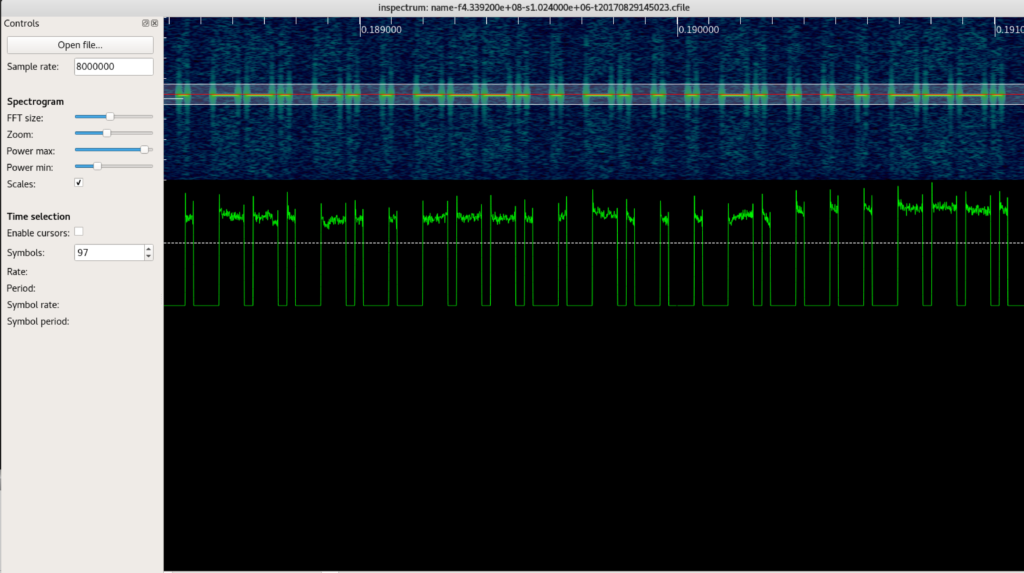
Now I want to focus on one of these groups, zoom in a bit, and add an amplitude plot to better visualize the signal.
Center the red line on the signal and you should now have a nice representation.
Note that depending on the strength of the signal, you may find the peaks on your amplitude plot looks closer to straight lines and less “squiggly” (a technical term) than the above. Either way, it won’t affect our ability to interpret.
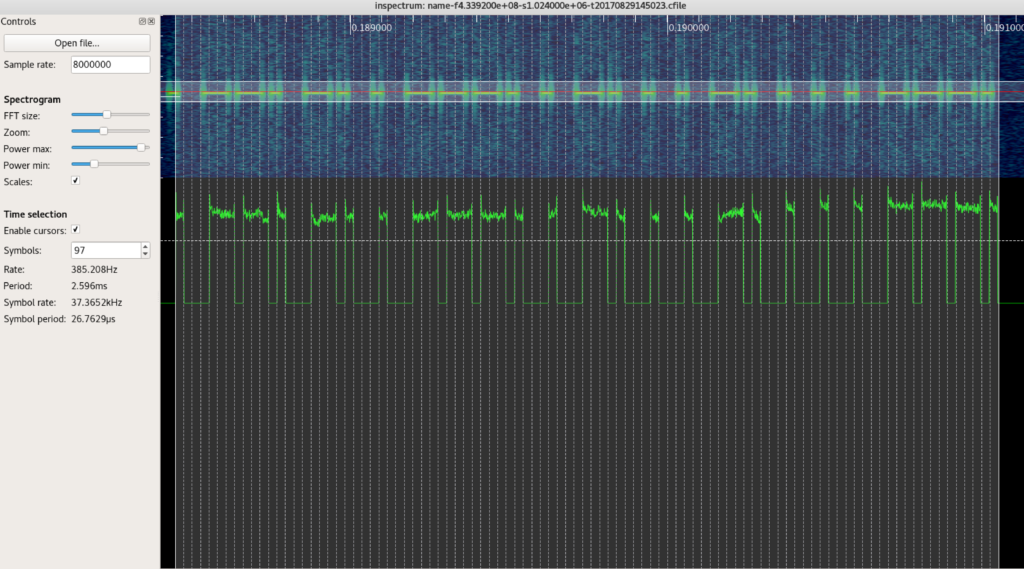
The next step is to plot our symbols. Select a symbol number (I usually start with about 40 depending on the size of the spectrogram) and check “Enable cursors” and you should see a vertical line plot appear somewhere on your screen. Move it to far left and resize those vertical bars to represent a single symbol. I’m not going to explain symbols/symbol rate but essentially in order for us to decode this signal, each horizontal line should align with exactly one smallest unit of measure representing a peak or valley in the amplitude plot. For example the very first peak on the above picture is considered one symbol. The next valley is equivalent to three symbols (three times the width of the first peak), and so on. Here’s a visual to help:
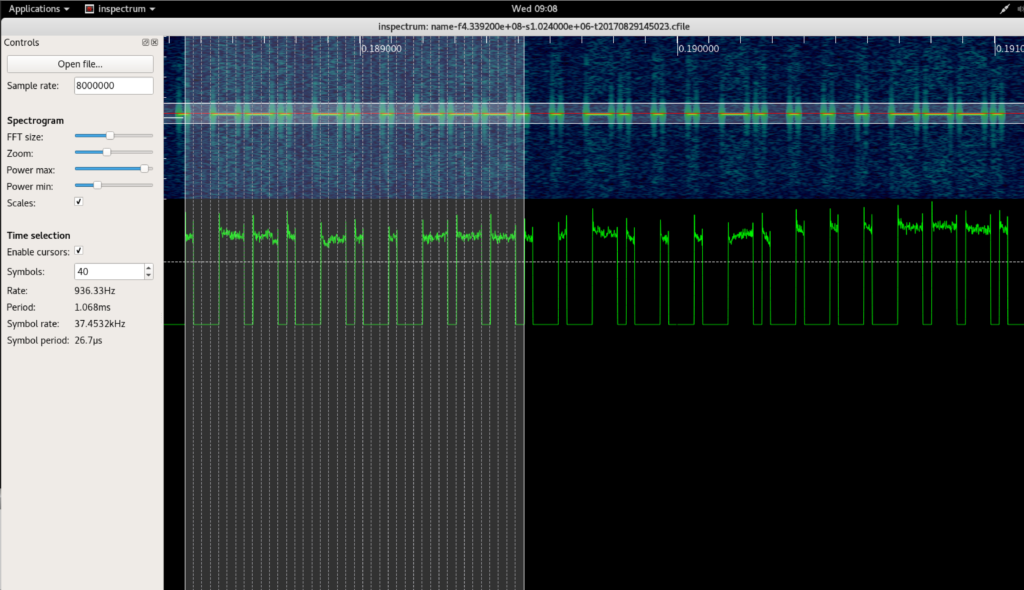
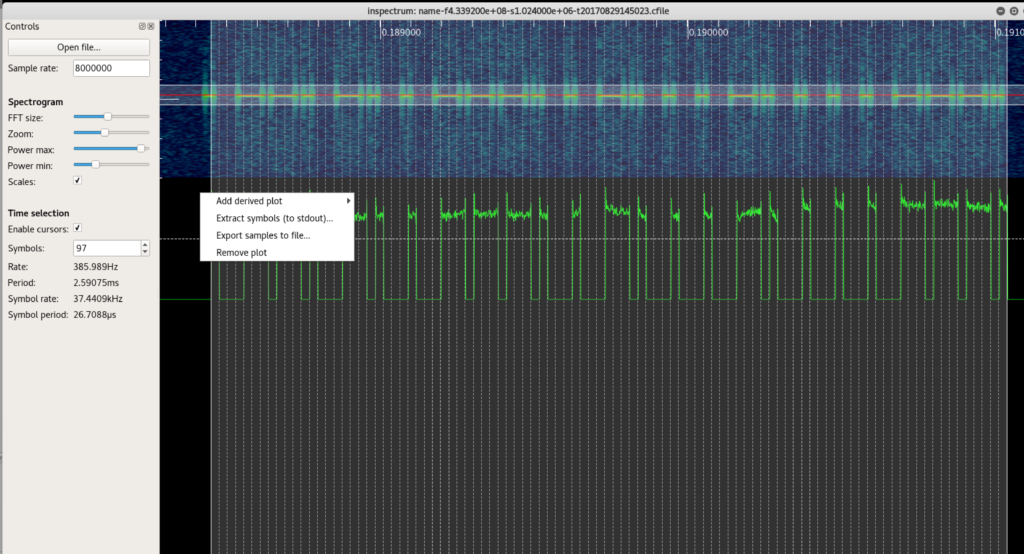
Now you want to increase the number of symbols until the cursor plot overlays exactly with the entire signal (in this case 97) which leaves me with the following:
Now right click and select “Extract symbols (to stdout)…”.
Go back to your terminal and you should see something like this:
zoo@kali-zoo:~/Documents/sdr# inspectrum /tmp/name-f4.339200e+08-s1.024000e+06-t20170829145023.cfile
0.597314, -0.9993, -0.998757, -0.999641, 0.492616, 0.461622, 0.457045, -0.999694, 0.548958, 0.501602, 0.484437, -0.999112, 0.540819, -0.999985, -0.999955, -0.999781, 0.573685, 0.546655, 0.541516, -0.999872, 0.524813, -0.999249, -0.999835, -0.999993, 0.564231, -0.999836, -0.999558, -0.999042, 0.612187, 0.581985, 0.49965, -0.999822, 0.533535, 0.550809, 0.536649, -0.999747, 0.527626, 0.604734, 0.604515, -0.998899, 0.551683, -0.999966, -0.998943, -0.999097, 0.5754, -0.999621, -0.999171, -0.999046, 0.626991, 0.584055, 0.572784, -0.999565, 0.6096, -0.999751, -0.99993, -0.99997, 0.576162, -0.999101, -0.999856, -0.999942, 0.637887, -0.999117, -0.999398, -0.999971, 0.639648, 0.618948, 0.659312, -0.99888, 0.661522, -0.999421, -0.999955, -0.999553, 0.649284, -0.999653, -0.999961, -0.999497, 0.727624, -0.999709, -0.999928, -0.999254, 0.75246, -0.998475, -0.999823, -0.999495, 0.596793, 0.647106, 0.623129, -0.998888, 0.528865, 0.576935, 0.664542, -0.999961, 0.618958, 0.623796, 0.57695, -0.99983, 0.701121,
Now we just need to decode those numerical symbol representations into bytes and we can transmit. I’ve got a very basic python script that I use for testing that looks as follows:
from rflib import *
import sys, bitstring

def init(device):
	device.setMdmModulation(MOD_ASK_OOK)
        device.setFreq(433920000)
        device.setMdmSyncMode(0x00)
        device.setMdmNumPreamble(0)
        device.setPktPQT(0)
        device.setMaxPower()
	device.setMdmDRate(2450)

def get_bitstring(*symbols):
	bs = ''
	for s in symbols:
    		if s > 0:
        		bs += '1'
    		else:
        		bs += '0'
	print bs

def bits2bytes(bit_string):
	return bitstring.BitArray(bin=str(bit_string.strip())).tobytes()

def xmit(bit_string):
	try:
		d.RFxmit((bits2bytes(bit_string)) * 10)
	except ChipconUsbTimeoutException:
        	pass
	except:
		print "Invalid bit string or xmit error"
		sys.exit()
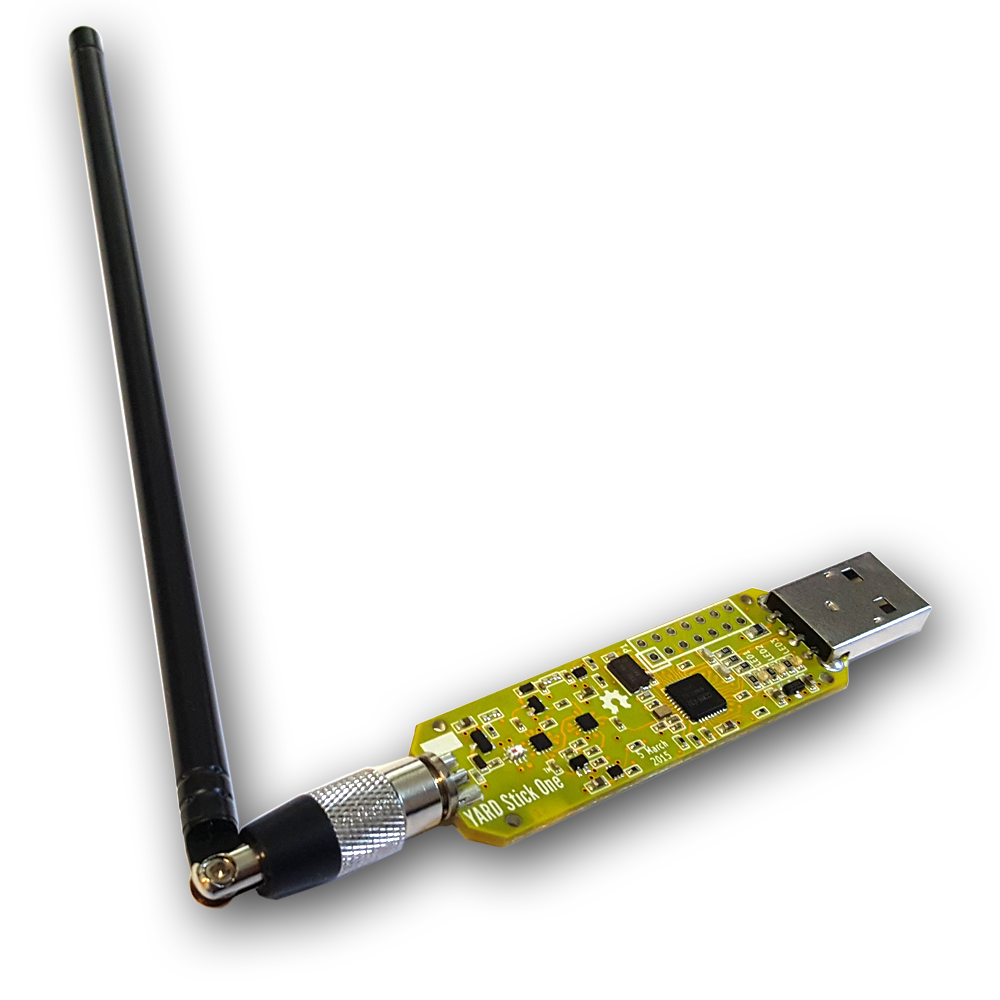
Now plug in your YARD Stick One, fire up RFCat and follow along. The first thing we need to do is run the above python script and initialize our YS1 device.
zoo@kali-zoo:~/Documents/sdr# rfcat -r

'RfCat, the greatest thing since Frequency Hopping!'

...

In [1]: %run yardstick_xmit.py
In [2]: init(d)
Now we want to convert our numeric symbols to a bit string representation.
In [3]: get_bitstring(0.597314, -0.9993, -0.998757, -0.999641, 0.492616, 0.461622, 0.457045, -0.999694, 0.548958, 0.501602, 0.484437, -0.999112, 0.540819, -0.999985, -0.999955, -0.999781, 0.573685, 0.546655, 0.541516, -0.999872, 0.524813, -0.999249, -0.999835, -0.999993, 0.564231, -0.999836, -0.999558, -0.999042, 0.612187, 0.581985, 0.49965, -0.999822, 0.533535, 0.550809, 0.536649, -0.999747, 0.527626, 0.604734, 0.604515, -0.998899, 0.551683, -0.999966, -0.998943, -0.999097, 0.5754, -0.999621, -0.999171, -0.999046, 0.626991, 0.584055, 0.572784, -0.999565, 0.6096, -0.999751, -0.99993, -0.99997, 0.576162, -0.999101, -0.999856, -0.999942, 0.637887, -0.999117, -0.999398, -0.999971, 0.639648, 0.618948, 0.659312, -0.99888, 0.661522, -0.999421, -0.999955, -0.999553, 0.649284, -0.999653, -0.999961, -0.999497, 0.727624, -0.999709, -0.999928, -0.999254, 0.75246, -0.998475, -0.999823, -0.999495, 0.596793, 0.647106, 0.623129, -0.998888, 0.528865, 0.576935, 0.664542, -0.999961, 0.618958, 0.623796, 0.57695, -0.99983, 0.701121,)
1000111011101000111010001000111011101110100010001110100010001000111010001000100010001110111011101
We could simply send this bit string using the above xmit() function but I usually like to see the hex representation. In this case it’s not really necessary but it may be if you’re faced with more complicated decoding (checksums) or need to extract alphanum data from the transmission for any reason.
In [4]: bits2bytes('1000111011101000111010001000111011101110100010001110100010001000111010001000100010001110111011101')
Out[1]: '\x8e\xe8\xe8\x8e\xee\x88\xe8\x88\xe8\x88\x8e\xee\x80'
Now we can simply send the signal (note the function sends it 10 times…you may need to adjust depending on what you’re testing).
In [4]: xmit('1000111011101000111010001000111011101110100010001110100010001000111010001000100010001110111011101')
And on comes the lamp I’ve got plugged into that outlet 🙂
Decoding the Off signal in the same manner produces a bit string that varies by only one byte:
In [5]: bits2bytes('1000111011101000111010001000111011101110100010001110100010001000111010001000100010001110111010001')
Out[2]: '\x8e\xe8\xe8\x8e\xee\x88\xe8\x88\xe8\x88\x8e\xe8\x80'
Sending that bit string now turns my lamp off.
Practical Application
If you haven’t played much in the SDR/RF space you might be asking yourself “So what?”. Turning on and off someone’s lamp might be annoying but doesn’t have many security applications. However, there are quite a number of other types of devices that operate at sub 1GHz frequencies including locks and alarms. There are also devices that use those frequencies to transmit data. Whether you’re assessing new technologies or performing physical penetration testing, you may find it useful to have the ability to interpret and replay radio signals.
Keep in mind that we only dealt with a very basic implementation of the simplest kind of modulation…there’s plenty more to delve into in the world of RF security!
Until next post…
– MC
 Security Sift
